Dr. Sajid Muhaimin Choudhury

>

image
Hello,

I'm Dr. Sajid Muhaimin Choudhruy

I am currently working in the Department of Electrical and Electronic Engineering of Bangladesh University of Engineering and Technology, Dhaka-1205. My official website is located at sajid.buet.ac.bd. I previously maintained various personal blogs and websites (sajidmc.net). I decided to move to a permanent web solution to host all my previous blogposts.

Blog

USBasp: The USB based AVR programmer

Update: My Programmer is working now. Read Here.

My laptop does not have serial port. And ponyprog, up until now, have not provided support for any USB programmers. Today, I constructed my first USB programmer on a breadboard. I had a old USB extenstion cable which was out of order as the header was slack due to wear. I cut of that part and soldered breadboard wires.

My first goal was to make a ponyprog compatible programmer that emulates parallel port. I started with: USB2LPT

Afterwards, I realized that the emulation makes programming too slow. Thus I had to move to a dedicated programmer. But I really like a GUI for inputting, especially the fusebits. AVRdude is a command prompt based programmer. A wrong fusebit setting can lock the microcontroller irrepairable by a Serial Programmer.

Then I found AVR8 Burn-O-Mat: GUI for avrdude . The interface is even better than pony prog for fuses. It actually has small comments beside fusebits. AVRdude even supports my simplified SIProg. So I proceeded to make the famous USB ASP (http://www.fischl.de/usbasp/) I forgot to connect the ICP and INT0 at first, and kept getting "Unknown USB device". I reflashed 4 times. Finally the programmer was operational and the driver was installed successfully.

I'll give details of my schematics later. Here is a picture of the circuit.


Update: My Programmer is working now. Read Here.

(Really) Beginners Microcontroller Guide (Part-II) Configuring Ponyprogproperly and writing program to uC

(A Continuation from (Really) Beginners Microcontroller Guide (Part-I) Compiling the first program)

(alpha version. Very unstable, still editing)

Writing program to Microcontroller

We will be using ponyprog from lancos. Although it is possible to program directly from winavr, I like the interface of the program very much.

Construct the simplified SI Prog. You'll need:
1. A serial port DB9 Female Connector,
2. 5V1 Zener Diodes x3
3. Resistors: 15K, 10k, 4k7 x 3
4. Bread board wires


Connect the circuit on veroboard. To see how it looks go to my blog http://sajiduc.blogspot.com/2008/04/beginners-microcontroller-programming.html


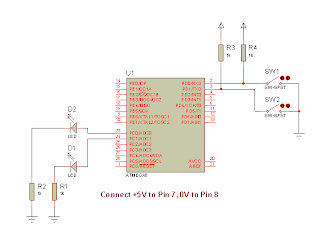
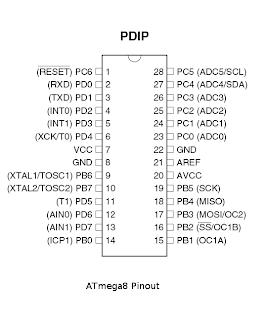
To connect the programmer always consult the datasheet of the microcontroller. Connect the Mosi, MISO, SCK, Reset lines of the programmer to the corresponding pins of microcontroller, and connect GND to 0V. Connect the serial connector to the serial port of your mother board. Please do not use a usb-serial converter, and connect only to true serial port.


Goto http://www.lancos.com/prog.html and download ponyprog from there. Install ponyprog, and open ponyprog from startmenu.


After the annoying neigh sound, click ok. Pony prog will say

Click ok again

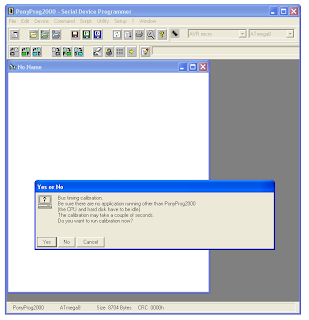
Now do the bus timing calibration:


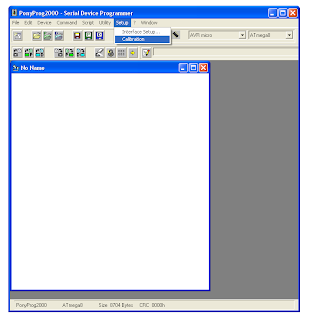
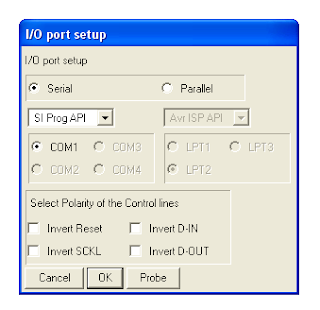
Afterwards, it is important. Click Setup>Interface Setup. Select Serial radio button. From drop down select SI Prog API / SI Prog IO. Select the COM port in which the programmer is connected. It is COM1 if you have only one serial port, but for multiple ports, you have to select the appropriate one. Please note that 90% cases, the SIProg does not work because of not proper configuration in this dialog. So if the SI Prog does not work, try to change the COM port, or switch between SI Prog API and IO


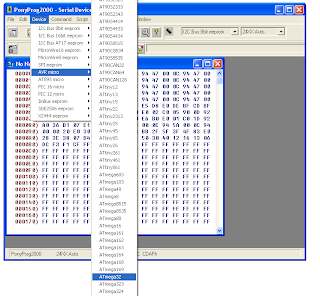
Select the appropriate device name


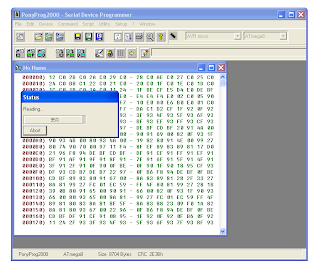
Now to test if the programmer is working, Click Command>Read All. From my experience 70% cases, people don't get a smooth read operation at the first try. See below for common problems


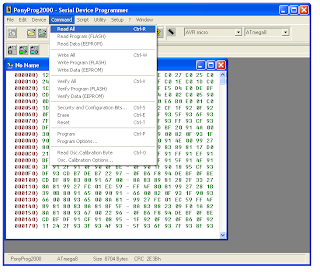
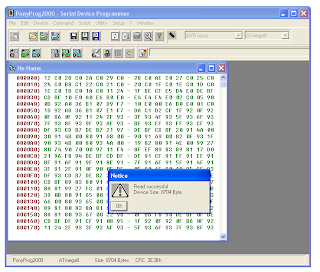
If every thing is ok, (Which actually did in my first experimental SIProg) Then reading will start.


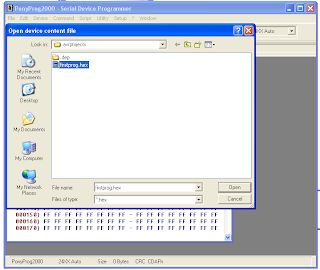
Now click File>Open, and open the testprog.hex file generated by the compiler.


Now select write all


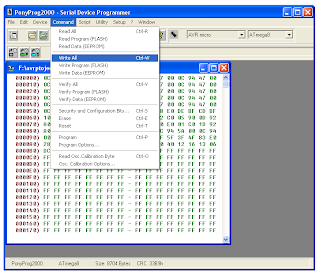
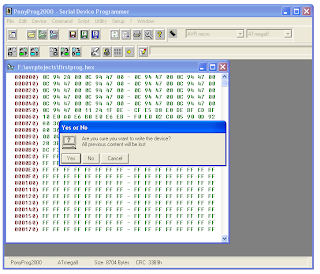
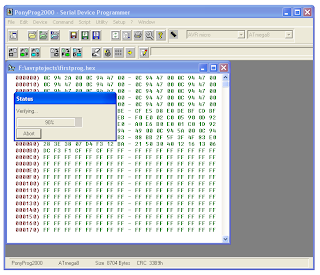
And then the write will be successful!

Then play with your microcontroller circuit:


Ofcource the write may not be successful.
This might be due to
1. Circuit connection error (Check if you have connected power to micr
ocontroller, check if the breadboard connections are loose, if the programmer are connected to the proper pins, if the programmer is soldered properly.)

2. Check if the BC547 transistor is working by testing if 0.7 V drop occus between Emitter and Base.

3. Check if your serial port is working and you are not using a USB-serial converter

4. Play around with the interface setup (in ponyprog) to find another suitable setting for you. (Try SIprog API, SIProg IO, Check if you have selected correct serial port)

5. This is very common for me:- the microcontroller is dead!!!!

Well, no 5 can result from 2 cases, a) a heart attack of the microcontroller (Fry out, like connecting Vcc of microcontroller to ground and ground to Vcc, microcontroller, at 90% cases just fry) b) Accidental programming of the fusebits of the microcontroller can result the SPI interface to be locked out. This can be overcome by a universal programmer. If you happen to have access to one, ask some one clear the lock bits.

6. You forgot to select the right device (I also sometimes forget to do that)

(Really) Beginners Microcontroller Guide (Part-I) Compiling the firstprogram


This tutorial will show you how to:
1. Write and compile your first program in WinAVR environment
2. Construct necessary hardware for the program execution
3. Load the program into Microcontroller using the Simplified SI Prog

The tutorial assumes that you have some knowledge of C/C++ programming. If you are looking for a good book to start AVR series C Programming for Microcontrollers Featuring ATMEL's AVR Butterfly and the free WinAVR Compiler is a great option.

Compiling the program

My program is quite simple. It will input from a port of a microcontroller checking if the pins are high or low. If the pin is high, the output will flash, other wise, the output will remain low.


Now to compile the code, we need the free winavr compiler. Download it from http://winavr.sourceforge.net/download.html

Install WinAVR.

Now go to Start>Programs>WinAVR>Programmer's Notepad (XP) or Orb>All Programs>WinAVR>Programmer's Notepad (Vista)

The main window pops up:


Select the coding scheme to C/C++ to better visualize the programming


Now type / copy paste the program:

#include <avr/io.h>

int main (void) {
char c;
int delay=10000;
int i=0;
DDRC = 0xFF;
DDRD = 0x00;
while (1) {
c = PIND;
PORTC = c;
while (++i < delay);
PORTC = 0x00;
while (--i > 0);
}
}
Save the program firstprog.c


Now in order to compile the program using winavr, we need a MAKEFILE. The WinAVR comes with a make file creator called "Mfile[WinAVR]". Go to it by using start menu.


In the MFile Edit window, you have only two menu: File and Makefile. Click on Makefile, and change MCU Type to ATmega8,


Change main program name to firstprog.c


Now Click File>Save As, and provide filename MAKEFILE with no extensions, in the same directory where you created the firstprog.c


Now go back to programmers notepad, and select, Tools>[WinAVR] Make All


If there is no typo or other problems, the output window (Viewed by pressing F8) will show like this.


Congratulations, you have successfully compiled your first program. (Well, hopefully :-| )

Your compiled files are in the folder:


Cont.. (Really) Beginners Microcontroller Guide (Part-II) Configuring Ponyprog properly and writing program to uC

Visit My Official Website at BUET

Contact Me
Sajid Choudhury
+9665650
Dhaka, Bangladesh